McGill Negotiation Simulator
What is the Simulator?
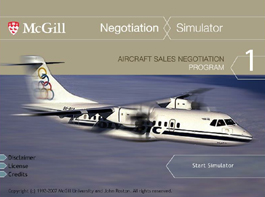
The Simulator was intended to give a student learning negotiation skills in a university MBA program the opportunity to practice those skills with a skilled negotiator who appears on the computer screen. The student then selects what to say from a menu of dialogue choices. In this case, it is a sales negotiation. The student is trying to sell a commuter aircraft to the Vice-President of Olympic Airways in Greece who appears on screen and talks to the student. The student selects a reply from a menu. It has been used in a number of university MBA programs in Canada, the U.S. and Australia.
The Simulator makes use of negotiation skills described in the book Getting to Yes authored by members of the Harvard Negotiation Project. The idea was that almost anyone who has read the book should find the Simulator useful and challenging even if they do not have the additional benefit from a negotiation skills course.
How old is the Simulator?
The Simulator was authored 30 years ago when computer based full video simulations were in their infancy. The lead author was John Roston and the co-author was David Saunders, both of whom were at McGill at that time.
The script consultants, teaching negotiation skills in university MBA courses at that time, were Bruce Barry at Vanderbilt University, Roy Lewicki at Ohio State University, Robin Pinkley at Southern Methodist University, Pat Seybolt at University of Utah, Tom Tripp at Washington State University, Joanne Leck at Universite de Montreal and Stephen Weiss at York University. None of them have been asked to endorse the continuing use of the Simulator 30 years after they were involved in its production.
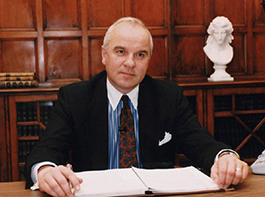
The airline Vice-President is played by John Geci, a professional negotiator, who sadly passed away in 2006 at the age of 63.
Is the Simulator obsolete?
The Simulator was authored from 1990 to 1992 and first publicly released in 1992 using the software and hardware available at that time which required two large videodisc players hooked up to a video overlay board in a computer. Although the script was not changed thereafter, the software and hardware became obsolete. Videodisc players were no longer necessary to run video and the Simulator was re-programmed with updated graphics in 2005 using the more advanced hardware and software then available. That software has in turn become obsolete. However it can still be run using Windows 10, although not as a certified application.
Although it's an ancient piece of software, some determined instructors teaching negotiation skills in university MBA programs have insisted on using it in recent years and received a very enthusiastic response from their students. Other intrepid individuals with an interest in negotiation skills and time on their hands may want to give it a go. It's also an example of a realistic simulated conversation.
Installing and running the Simulator isn’t simple, but it can be done. Our suggestion is to read Getting to Yes before tackling the installation, but those addicted to gaming may want to jump right in and see how they do in the negotiation session before reading up on how it should be done. Good luck with that.
Server and Standalone Versions of the Software
The Simulator has been used in a university setting where student workstations in a lab are controlled from a server that both dictates how the Simulator will run and collects full data on each student’s negotiation session. This allows the instructor to modify the settings on the Simulator and make the negotiation session more or less difficult for each student; for example, how much help is available and whether a student is told which negotiation skill is the focus during a particular topic of conversation. Instructors would usually set a time limit on the student’s negotiation session which included doing the necessary preliminary research on the negotiation situation using background material. The student would have to decide how much time to allocate to preliminary research and how much to the negotiation session.
The server version is not being made available at this time. Up until now, the Simulator was not available as a standalone app to prevent students from getting an unfair advantage by using it at home before using it in a university computer lab. In releasing the standalone version now, all of the settings have been left in their original default positions which maximize the help available and reveal the negotiation skill that is the focus during a particular topic of conversation. It is not possible to change the settings in the standalone version.
Getting Started
It is recommended that you first read Getting to Yes. The Simulator was based on the original 1981 edition by Roger Fisher and William Ury. The second 1991 edition added Bruce Patton as a co-author and primarily provided additional material. There is also a third 2011 edition which is widely available in many formats at low cost on the internet. There appears to be a free copy of the second edition here, but we haven’t checked it out and have no idea whether it is a legal copy.
Secrity Vulnerabilities
The McGill Negotiation Simulator is obsolete software. The latest version was issued in 2007 before Windows 10 existed. Although it runs under Windows 10 and does not have any security vulnerabilities that we know of, it does not have Windows 10 certification and is not recognized by it. Windows Defender and anti-virus software will therefore likely pop-up a warning the first time the Simulator is run and will have to be told to run it anyway. This should only happen the first time it is run.
The Simulator uses Apple QuickTime Player 7.0.3, which is also obsolete software, to run its video. The Simulator will not operate properly with older or newer versions of QuickTime Player. QuickTime Player 7.0.3 has potential security vulnerabilities. It is a good idea to disconnect from the Internet while it is running. It can be uninstalled after using the Simulator and re-installed before using the Simulator again.
Instructions for installing and running the Simulator are in the column at right.
Installation Instructions
Fair Warning!
Installing and running the Simulator for the first time isn’t simple.
The known security vulnerabilities are described at the bottom of the column at left.
Step 1 – Download the Simulator .zip file.
Go to the file in Google Drive here.
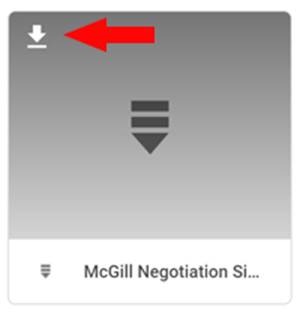
If in icon view, mouse over the file icon labelled McGill Negotiation Simulator.zip and the download symbol will appear. Click on the download symbol.
If in list view, right click on the file named McGill Negotiation Simulator.zip and click on Download.
A pop-up message will state that due to the size of the file, it cannot be checked for viruses. Click on Download Anyway. Your anti-virus software will check for viruses during the download.
A pop-up message at the bottom of the screen will show when file download is complete. It may be saved automatically in your Downloads folder or you may have the option to choose where it is saved. Most people save it or move it to their Documents folder.
Step 2 – Extract the Simulator files.
In the Documents or other folder where you placed the file, double click on the file name McGill Negotiation Simulator.zip. You will then see a list of all the Simulator files.
Click on the Extract All button at the top of the window.
Then click on Extract at the bottom of the pop-up window which appears. A sub-folder named McGill Negotiation Simulator will appear containing all the Simulator files.
Step 3 – Check for other versions of QuickTime Player.
Click on the Start button in the lower left corner of your screen.
Click on Settings > Apps > Apps & features.
Scroll down the list of apps to QuickTime. Close the window if there is no QuickTime.
If there is QuickTime, click on it. The version number will appear under the name QuickTime. If it is not 7.0.3, click on Uninstall. Once it is uninstalled, close the window and Restart the computer. This is important.
Step 4 – Install QuickTime Player 7.0.3
In the McGill Negotiation Simulator folder, double click on quicktime703.exe. If a pop-up message says that it isn’t a Microsoft verified app, click on Install anyway. During the installation, use the default settings. It may pause for a long time when computing the space requirements.
When installation is complete, click on Finish. It will pop-up an ad for other software, click on No thanks.
To enhance security, QuickTime Player can be uninstalled after using the Simulator:
Click on Start > Settings > Apps > Apps & features.
Scroll down the list of apps to QuickTime. Click on it then click on Uninstall.
Once it is uninstalled, close the window and Restart the computer. This is important.
Step 5 – Test the Simulator.
In the McGill Negotiation Simulator folder, double click on the file McGill Negotiation Simulator.exe.
Microsoft Defender SmartScreen may pop-up a message that it prevented an unrecognized app from starting. Click on More info then on Run anyway.
Anti-virus software may pop-up a message that the Simulator has been blocked. If so, click on the Unblock button if there is one or on View details then on Notifications then on Allow access for Macromedia Projector. If the Simulator does not start, go back to the McGill Negotiation Simulator folder and double click again on the file McGill Negotiation Simulator.exe.
The Simulator should then load and you should see the opening screen for Aircraft Sales Negotiation. Click on Start Simulator. Menu choices should appear and the narration should start.
Step 6 – Optional – Create a Shortcut on the Desktop
In the McGill Negotiation Simulator folder, right click on the file McGill Negotiation Simulator.exe. Click on Create shortcut. The shortcut will appear in the directory. It can then be dragged onto the desktop.